1. Construct Eclipse Development Environment
To develop web applications based on iPLAss, the gradle project skeleton for Eclipse is provided.
This guide will go through the process starting from setting up the Eclipse and compiling the projects, until eventually start the web applications after all the configurations.
2. Prerequisite
In order to construct the development environment, please have the following environment prepared.
JDK |
|
AP Server |
|
DB Server |
One of the followings
|
Eclipse |
2.1. Setting Tomcat
Install/Decompress the downloaded installer or compressed files to any directory.
Put the JDBC driver of the corresponding Database being used in the lib folder at Tomcat’s directory.
|
In real-life production environment, there are cases that the Database rely on DataSource for connections.
To use DataSource, it is necessary to place the JDBC driver in the directory of Tomcat. This document does not use DataSource, but for the reason depicted above, we want to place the JDBC driver at Tomcat side rather than the project side. |
2.2. DB Configuration
If there is no existing database and tables for iPLAss, then it is necessary to configure the DB in order to start with.
Please follow one of the following methods to create the database and tables.
-
Use Install and Run wizard.
-
Download iPLAss SDK, and execute the DDL included in the package to create the database and tables.
| When constructing production environment, please utilize the DDL files from iPLAss SDK. As the method from Install and Run is not recommended in that case. |
2.3. Configuring Eclipse
-
Run the downloaded installer.
IfJAVA_HOMEwas not set, the dialog to selectjavaw.exewill show up. Please select thejavaw.exein the directory of the installed JDK. -
On the started interface page, select
Eclipse IDE for Enterprise Java and Web Developers, and install to any directory. -
After the installation, start the Eclipse and create the workspace at any directory.
-
From the menu bar, choose
Window > Preferencesto open the interface for settings.-
Settings for Encoding
AtGeneral > Workspace, change the Text file encoding toOther(UTF-8). -
Settings for JDK
Make sure the installed JDK shows inJava > Installed JREs. If it was not there, add the JDK manually and set it to default. Then, openJava > Compilerand check ifCompiler compliance levelis21. -
Setting for Tomcat
Add the installed Tomcat inServer > Runtime Environments. ChooseApache Tomcat v10.1, and specify the Tomcat directory that we installed previously.
This procedure assumes Eclipse IDE for Enterprise Java and Web Developers(2023-09). -
3. Create the Project
Project is using the template repository from GitHub .
Create a new repository from Use this template and clone it, or please download the zip file.
3.1. Create with Template
The project can be created by the following steps.
-
At
Use this template, click on `Create a new repositoryto move to the repository creation page. -
Specify
OwnerandRepository nameon the repository creation page to create a repository. -
Import the project.
-
Copy the URL from Clone option.
-
Select
File > Import…from the Eclipse menu bar. -
Then choose
Git > Projects from Git. -
Then
Clone URI. -
Make sure the copied URI is in Location’s URI box. and enter the username and password for authentication to your login as required.
-
Choose
masterbranch. -
At Destination’s
Directory, specify the workspace that was indicated when starting the Eclipse. -
Choose
Import as general projectat project import wizard. -
Project Name does not need to be modified, just click
Finish.
|
When creating the project by template, a Github account is necessary. "Personal access tokens" are required for login authentication, so if you have not yet created one, please create one from "Settings > Developer Settings" in the GitHub menu. |
3.2. Create with ZIP File
The project can be created with the following steps.
-
At
Clone or download, click onDownload ZIPto download the ZIP file. -
Decompress the ZIP file, and move the
iplass-skeletonfolder to the root directory of your workspace.
-
Select
File > Import…from the Eclipse menu bar. -
Then
General > Projects from Folder or Archive. -
For
Import source, specify the folder you moved to the workspace, uncheck theDetect and configure project natureand then clickFinish.
3.3. Create with iPLAss SDK
Create the project with the skeleton project included in iPLAss SDK.
-
Download from Download_Site or from the URL given along with the enterprise edition’s contracts.
-
Decompress the iPLAss SDK, place the
iplass-skeletonfolder to the workspace of eclipse.
For the enterprise edition, it is iplass-ee-skeleton.
|
-
Open the
iplass-ee-skeletonfolder and overwrite the existedgradle.propertiesby the one provided along with the Enterprise Edition’s contracts.
You need to add the username and password distributed at the time of contract to gradle.properties of the enterprise edition.iPLAssMavenRepoUsername=xxxxxiPLAssMavenRepoPassword=xxxxxxxx
|
-
Select
File > Import…from the Eclipse menu bar. -
Then
General > Projects from Folder or Archive. -
For
Import source, specify the folder you moved to the workspace, uncheck theDetect and configure project natureand then clickFinish.
3.4. General Settings After Importing
-
Decide the name for the projects and change it via
Refactor > Rename. -
Use
Refactor > Moveto move the project folder corresponding to the project name. -
Change the
rootProject.namefromsetting.gradleaccording to the project name.
-
As mentioned before, the JDBC driver placed in Tomcat directories will be used when running the web applications. It is also used when running the Tenant tools which will be discussed later.
-
Oracle(ojdbc8.jar)'s case
From the vendor’s download site, you can download the jar file, please put it in the lib folder directly under the directory of the project. -
Any of MySQL, PostgreSQL, SQLServer
Uncomment the relative line from build.gradle.
-
-
Right click the project, and click
Configure > Add Gradle Natureto turn the project to a gradle project. -
Click the
Gradle > Refresh Gradle Projectto start downloading the dependencies.
If you use a proxy server, please refer to the following and add proxy settings to gradle.properties and then refresh.systemProp.http.proxyHost=xxx.xxx.xxx.xxxsystemProp.http.proxyPort=xxxxsystemProp.https.proxyHost=xxx.xxx.xxx.xxxsystemProp.https.proxyPort=xxxx
|
-
Get to the project’s
Propertieswindow, and do the following operations. -
Modify the
Context rootfromWeb Project Settingsaccording to the project name. -
Check the following items in
Project Facetsin the left pane and set the version.
After that, click theRuntimestab in the right pane and check the Tomcat (Apache Tomcat v10.1) installed in advance. If it does not exist in the options, add it using theNew…button.
| Project Facet | Version |
|---|---|
Java |
21 |
Dynamic Web Module |
6.0 |
Runtimes |
Apache Tomcat v10.1 |
-
Modify the settings from
src/main/resources/mtp-service-config.xml. Please change the following items.
<serviceDefinition>
    <inherits>/mtp-core-service-config-oracle.xml</inherits> (1)
    <!-- If use mysql, inherits mtp-core-service-config-mysql.xml for convenience. -->
    <!--
    <inherits>/mtp-core-service-config-mysql.xml</inherits>
    -->
    <!-- If use postgresql, inherits mtp-core-service-config-postgre.xml for convenience. -->
    <!--
    <inherits>/mtp-core-service-config-postgre.xml</inherits>
    -->
    <!-- If use sqlserver, inherits mtp-core-service-config-sqlserver.xml for convenience. -->
    <!--
    <inherits>/mtp-core-service-config-sqlserver.xml</inherits>
    -->

    ・・・

    <service>
        <interface>org.iplass.mtp.impl.rdb.connection.ConnectionFactory</interface>
        <!-- DriverManager base ConnectionFactory -->
        <class>org.iplass.mtp.impl.rdb.connection.DriverManagerConnectionFactory</class>

        <!-- ■ your rdb setting 1 ■ -->
        <!-- for oracle --> (2)
        <property name="url" value="jdbc:oracle:thin:ADDRESS:PORT:DB" /> (3)
        <property name="user" value="XXXXX" />
        <property name="password" value="XXXXX" />
        <property name="driver" value="oracle.jdbc.driver.OracleDriver" />

        ・・・

    </service>

    ・・・

    <service>
        <interface>org.iplass.mtp.impl.lob.LobStoreService</interface>

        <!--
            To save Binary data in files, uncomment the following comments.
            FileLobStore is mandatory for MySQL and PostgreSQL.
            ※The following setting is to store Binary data in file, and LongText data in RDB.
            If it is need to store LongText data in files, please also set the setting of longTextStore to FileLobStore.
        -->
        <!--
        <property name="binaryStore" class="org.iplass.mtp.impl.lob.lobstore.file.FileLobStore"> (4)
            <property name="rootDir" value="[setYourBinaryFileStoreRootPath]" /> (5)
            <property name="overwriteFile" value="false" />
        </property>
        <property name="longTextStore" class="org.iplass.mtp.impl.lob.lobstore.rdb.RdbLobStore">
        </property>
        -->

        ・・・

    </service>

    ・・・

    <service>
        <interface>org.iplass.mtp.impl.mail.MailService</interface>

        ・・・

        <!-- ■ for develop only (additional="true) ■ -->
        <!-- To enable the debug mode for sending mails, Please uncomment the following code.-->
        <!--
        <property name="listener" class="org.iplass.mtp.mail.listeners.LoggingSendMailListener" additional="true"/> (6)
        -->
    </service>

    ・・・

</serviceDefinition>| 1 | Change depending on the DB in use. |
| 2 | Comment/Uncomment depending on the DB in use. |
| 3 | Change along with the created DB scheme. |
| 4 | Uncomment it if using MySQL or PostgresSQL. |
| 5 | Set the any path to store binary files. (For Windows, an example is C:\iPLAss\binary) |
| 6 | Uncomment it only for development environment. |
At this point, the project is successfully deployed.
4. Create the Tenant
Tenant is like the conceptual division of the server. We have to specify which tenant to access when using iPLAss. Let’s use the GUI tools to create a Tenant.
-
Run the Gradle task
runTenantBatchfrom the command line.-
Execution path: Directly under the project
-
Command to run:
gradlew runTenantBatch
-
-
Click the
Create Default Tenanton the shown interface. -
On the dialog, input
name,AdminUserId,AdminUserPasswordand clickCreate.
After confirming that "Execute Result: SUCCESS" is displayed in the log of the dialog screen, close the dialog.
| before creating the tenant, please make sure to configure mtp-service-config.xml and set the DBA user with corresponding privileges. |
AdminUserId should be over 4 characters long and can be composed only by English characters, numbers, and the specific special character of - , @ , _ , .AdminUserPassword should be over 6 characters long and only be composed by English characters, numbers, and the following special character: ~!#\\$^&*+;:?/|{}\\.=_,- .
|
5. Execution
We will start the server, and access the Tenant from the browser.
5.1. Start the Server
-
Right click the root of the project in Eclipse, choose
Run As > Run on Server. (Later on you can start fromServertab) -
Select
Tomcat v10.1 Serverthen click on [Finish]. IfAlways use this server when running this projectis checked, the server will directly go for the same setting on forth.If the Tomcat admin portsetting is "-", Tomcat will fail to start. Please set an appropriate unused port such as "8015".
5.2. Show the Login Page
-
Once the server is running, access the following URL(URL of the top view of the GEM module) by the browser.
http://localhost:8080/Context_Name/Tenant_Name/gem/
For instance, if the project was created with context name being sampleApp, and tenant being sampleTenant, then the URL will be:
http://localhost:8080/sampleApp/sampleTenant/gem/
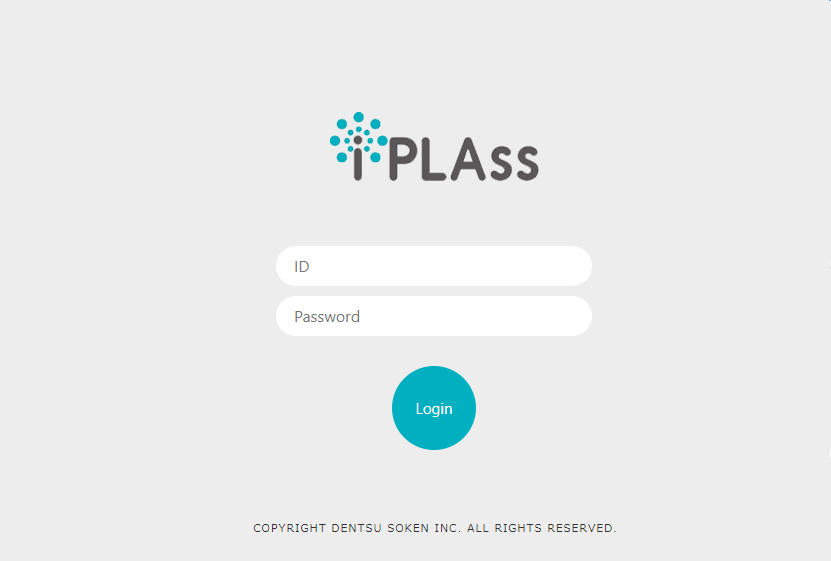
If the web application started normally, the following login page will be presented. Please use the manager ID and password specified when creating the tenant to log in.
6. Next Step
For the people who are first time with iPLAss, please begin your journey with our Tutorial.